HDR (High Dynamic Range) photography helps balance light and dark areas in photos, making it popular for real estate images. However, over-processing can make these photos look fake, with oversaturated colors, halos, and flat shadows. Here’s why HDR photos can appear unrealistic and how to fix them:
Common Issues with HDR Photos:
- Overdone Tone Mapping: Leads to unnatural colors and exaggerated contrasts.
- Halos: Bright outlines around objects due to excessive editing.
- Flat Lighting: Removing shadows and highlights eliminates depth.
- Ghosting: Blurry or doubled objects caused by motion between exposures.
- Noise Amplification: High ISO settings increase graininess during editing.
Solutions for Natural-Looking HDR:
- Subtle Tone Mapping: Make minimal adjustments to keep colors and contrast realistic.
- De-Ghosting Tools: Use software to address motion artifacts.
- Manual Exposure Blending: Combine the best parts of multiple exposures for better control.
- Low ISO and Stability: Use a tripod and low ISO settings to reduce noise and misalignment.
- Thoughtful Post-Processing: Adjust sharpness, contrast, and color balance carefully.
For real estate, natural HDR photos create trust and attract buyers. Professional services like HomeJab offer HDR photography packages starting at $229, ensuring high-quality results with a 24-hour turnaround.
Top 5 HDR Mistakes in Real Estate Photography
Common Reasons HDR Photos Appear Fake
HDR processing, when overdone, can make photos look unnatural. Let’s break down the common culprits behind this issue.
Too Much Tone Mapping
When tone mapping is pushed too far, it compresses the HDR data excessively. This often leads to oversaturated colors, exaggerated contrasts, and textures that look unnaturally sharp. By trying to enhance every detail in both shadows and highlights, the natural balance of the scene is disrupted, resulting in an image that feels artificial.
Halos and Processing Artifacts
Halos are bright outlines that show up around high-contrast edges, like rooflines, window frames, or where dark and light areas meet. These are often caused by HDR software trying too hard to restore midtone contrast. For example, when shooting against the sun, the increased contrast makes halos more likely. This issue is especially noticeable in exterior real estate shots. On top of that, excessive sharpening and contrast adjustments during post-processing can also lead to these unnatural outlines.
Loss of Natural Shadows and Highlights
HDR processing that removes all shadows and highlights can leave an image looking flat and lifeless. Shadows and highlights are what give a photo depth and dimension.
"A natural scene, in my opinion, is one that presents highlights and shadows and, using those, manages to focus the viewer’s attention onto the main subject. Overdoing HDR leads often to a scene that has a lot of local contrast, but no clearly defined areas of light and darkness and thus ends up looking very flat and unnatural." – Ugo Cei, Photographer
Without these natural lighting variations, the image may have plenty of detail but lacks the overall sense of depth that makes it feel realistic.
Ghosting and Movement Problems
Ghosting occurs when movement between exposures causes semi-transparent duplicates or blurred edges. This is common with moving elements like trees, clouds, or even slight camera shake. While deghosting tools can help, they sometimes introduce new artifacts. In real estate photography, ghosting might show up as blurry curtains from air conditioning, doubled reflections in windows, or overlapping figures in the frame.
High ISO and Noise Problems
Using a high ISO setting can introduce digital noise, which tone mapping tends to amplify. This results in gritty textures, especially in shadow areas that are brightened during processing. What might have been subtle noise in darker parts of the original image becomes glaringly obvious after HDR adjustments, making the photo look overly processed.
Recognizing these issues is the first step toward creating more natural-looking HDR images, which we’ll explore further in the next section.
How to Fix Fake-Looking HDR Photos
If your HDR photos are coming across as too artificial, don’t worry – there are practical ways to fix this and create more natural-looking images. Let’s dive into some techniques that directly address common issues.
Use Subtle Tone Mapping
When it comes to HDR photography, less is often more. Tone mapping adjusts the brightness and contrast of HDR images so they display well on standard screens. But going overboard with these adjustments can lead to halos, excessive noise, and an unnatural feel. Start with minimal tweaks – keep saturation low and avoid pushing contrast too far. Restoring some contrast during tone mapping can help prevent your image from looking flat. The idea is to bring out details in both shadows and highlights while keeping the lighting realistic.
Use De-Ghosting Tools
Ghosting happens when objects move between exposures, but most modern HDR software includes de-ghosting tools to tackle this issue. Experiment with different tools, as their effectiveness can vary depending on the type of motion. For instance, Photoshop CS5’s “Remove ghosts” feature works well for things like moving flags. For more complex cases, you can address ghosting in your RAW files using tools like Lightroom before merging exposures. Alternatively, choose different images from your bracketed shots to minimize ghosting.
Manual Exposure Blending
While automated HDR tools are convenient, manual exposure blending gives you more control. This method involves picking the best-exposed parts from each bracketed shot – one might capture the highlights perfectly, while another preserves shadow details – and blending them together. This approach reduces noise and helps maintain natural textures. Use local adjustments to fine-tune specific areas of the image based on their lighting needs. Pairing this method with good in-camera practices can make a big difference.
Shoot with Stability and Low ISO
Getting it right during the shoot is just as important as post-processing. Use a sturdy tripod to keep your camera steady, as even slight movements between exposures can lead to alignment issues or soft edges. Stick to a low ISO setting (like ISO 100 or 200) to minimize digital noise, which can become more noticeable during tone mapping. Also, allow any vibrations to settle before taking each shot. These small steps ensure sharp, well-aligned exposures that preserve the natural look.
Post-Processing for Natural Results
The final step is all about refining your image. Adjust sharpness and contrast to fix any softness and avoid blown-out highlights. Use tools like Photoshop’s Clone Brush or Healing Brush to clean up any artifacts that remain. Lastly, pay close attention to color balance – this ensures the space feels inviting and realistic. A little extra care in post-processing can make all the difference in achieving a polished, natural result.
sbb-itb-82c5f45
Comparing Fake vs. Natural HDR Photos
Understanding the difference between over-processed and natural HDR photos is crucial for creating trustworthy property listings. Spotting the signs of excessive editing versus subtle adjustments helps highlight a space’s real appeal. These distinctions make all the difference when presenting a property.
Key Differences in HDR Style
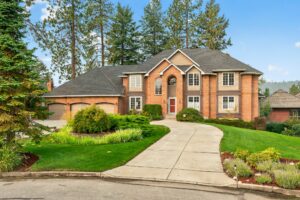
When HDR processing takes over the image, it’s a clear sign of over-editing. Over-processed HDR photos often feature unnaturally bright colors, extreme saturation, and halos around high-contrast areas, giving the image a cartoon-like feel.
This type of editing also removes natural shadows, resulting in flat, lifeless images that lack depth. Textures may look overly sharp or artificial, creating a plastic-like effect that feels far from authentic.
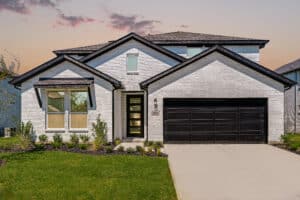
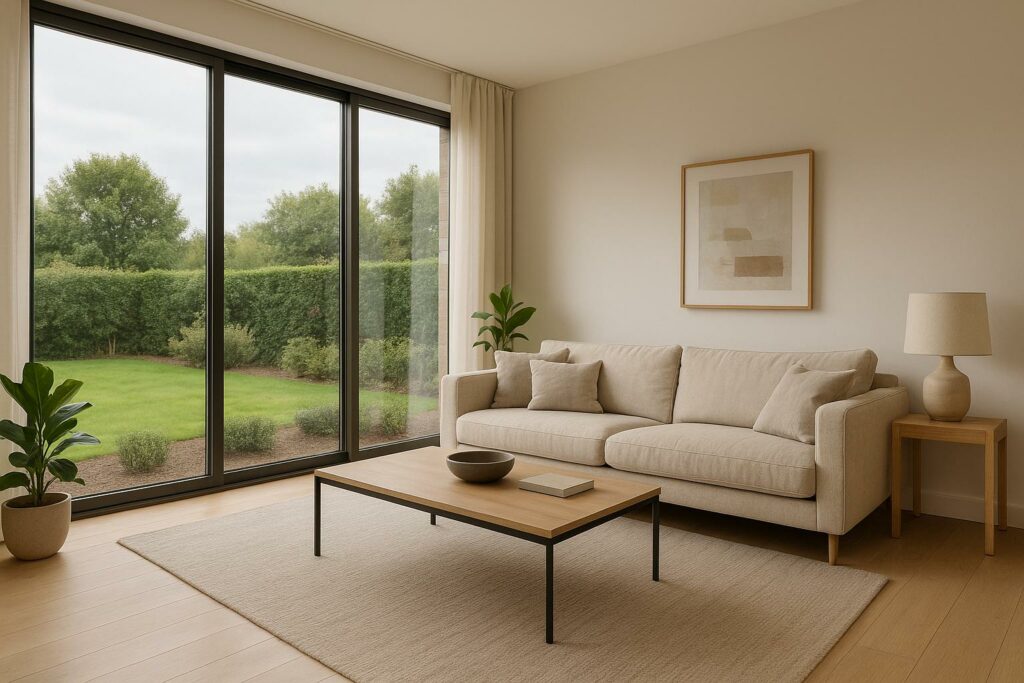
On the other hand, natural HDR photography strikes a perfect balance. Colors stay true to the actual space, shadows add depth and dimension, and highlights retain key details without looking washed out. The goal is to subtly enhance the image while keeping it realistic, ensuring the processing doesn’t distract from the space itself.
Visual Comparison Table
| Aspect | Over-Processed HDR | Natural HDR |
|---|---|---|
| Color Saturation | Overly vibrant, unnatural colors | Balanced, realistic colors that reflect the space |
| Shadow Detail | Flat shadows with no contrast | Natural depth with preserved shadow details |
| Halos | Noticeable halos around edges, especially windows | Clean edges with no glowing effects |
| Texture Appearance | Plastic-like, overly sharp textures | Authentic textures that feel realistic |
| First Impression | "This looks overly edited" | "What a stunning, natural-looking space" |
| Buyer Trust | May create doubts about photo accuracy | Instills confidence in the listing’s authenticity |
How HomeJab Delivers Natural HDR Photography
Creating natural HDR photography isn’t just about having the right gear – it takes skilled photographers who know how to showcase properties in a way that feels authentic. HomeJab combines expert techniques with efficient processes to deliver images that highlight properties as they truly are.
Professional HDR Photography Skills
HomeJab connects real estate professionals with local photographers who excel at producing natural HDR images. These experts understand how to replicate the way the human eye perceives light, resulting in photos that feel both realistic and inviting.
Using advanced techniques, they tackle tricky lighting conditions like bright windows or shadowy corners. Through careful tone mapping, they balance shadows, highlights, and details to maintain the property’s true essence – steering clear of exaggerated or overly processed effects. Every photographer in HomeJab’s network undergoes a rigorous vetting process to ensure they deliver polished, professional results every time.
Fast Turnaround and Consistent Quality
Speed and quality go hand in hand with HomeJab. Their streamlined workflows ensure that HDR photos are ready within 24 hours, helping real estate agents get listings online quickly without compromising on quality. By following a standardized process, HomeJab photographers consistently produce natural-looking images, no matter the location. This uniformity is especially helpful for agents managing multiple properties, as it creates a cohesive and professional brand image across all their listings.
Better Listings with Natural Media
Natural HDR photography doesn’t just make properties look good – it helps them sell faster. Listings featuring HDR photos see 50% faster sales and attract 118% more online views. But these results only come when the images stay true to the property’s actual look and feel. HomeJab’s approach ensures that its HDR photos enhance a property’s appeal without sacrificing authenticity, helping listings stand out in competitive markets and building trust with potential buyers.
HomeJab offers HDR photo packages priced between $229 and $379, with options that include 15 to 50 photos. These packages provide high-quality images that highlight a property’s best features while ensuring the fast turnaround and realistic HDR processing that real estate professionals depend on.
Conclusion: Getting Natural HDR for Better Property Listings
Creating natural HDR images goes beyond just adjusting camera settings – it’s about striking the perfect balance between light and shadow to truly capture a property’s essence. The difference between overdone HDR and natural HDR can significantly impact how potential buyers perceive a listing. This balance doesn’t just preserve realism; it highlights the property’s charm in an increasingly competitive real estate market.
To achieve realistic HDR, it’s all about subtle tone mapping, blending exposures carefully, and using proper post-processing techniques. When executed well, HDR photography can reveal a property’s true character while addressing tricky lighting situations – like overly dark interiors or overly bright windows – that can otherwise diminish the quality of the image.
Natural HDR photography has a measurable impact on property listings. Homes featuring HDR photos receive 61% more online views compared to those with standard images. Additionally, 32% of homes with high-quality photos sell faster, making a strong case for investing in professional photography. Considering that 84% of online buyers rank photos as a critical factor in their decision-making, it’s clear that natural HDR can make a meaningful difference in both engagement and sales outcomes.
For agents aiming to consistently showcase properties with true-to-life HDR, HomeJab offers a professional and efficient solution. Their photographers are trained to handle challenging lighting scenarios and remove visual distractions, ensuring each image captures the property in its best light. Backed by an AI-driven quality control system and human review, HomeJab guarantees high standards for every photo. With HDR packages starting at $229 for 15 to 50 photos and a 24-hour turnaround, agents can focus on their expertise while leaving the photography to the pros.
"We pride ourselves on delivering unmatched quality and reliability." – Jimmy Hennessey, Head of Sales at HomeJab
The ultimate goal is to create images that are both accurate and appealing, building trust with buyers while presenting properties in their best form. By combining expert techniques with precise post-processing, natural HDR continues to be a cornerstone of effective real estate photography.
FAQs
How can I tell if my HDR photo looks unrealistic, and how can I fix it?
HDR photos can sometimes cross the line into looking artificial. This happens when you notice things like halos around edges, unnatural colors, excessively sharp details, or over-the-top contrast. Instead of drawing the viewer in, these flaws can make the photo feel more like digital art than a true photograph.
To keep your HDR shots looking natural, focus on making subtle tweaks. Start by dialing down the saturation and sharpening, and be cautious not to overdo the contrast. If you spot halos or edits that stand out in an unnatural way, scale them back. Striving for a balanced, realistic appearance will make your HDR images feel polished and authentic.
How can I avoid issues like ghosting and halos in HDR photos during editing?
To minimize ghosting and halos in HDR photos, prioritize software equipped with advanced tone mapping and local contrast adjustment tools. These features are key for blending multiple exposures seamlessly, resulting in a more natural appearance.
You can also tackle specific problem areas with selective editing to address halos or ghosting directly. Dialing back the intensity of HDR effects further helps create a more realistic and polished final image, free from distracting artifacts.
Why is a low ISO setting important in HDR photography, and how does it improve image quality?
Using a low ISO setting in HDR photography plays a key role in reducing noise and capturing sharper, more detailed images. A lower ISO setting enhances the dynamic range of your camera, helping it record bright highlights and deep shadows with greater accuracy. This creates HDR photos that appear more balanced and lifelike.
That said, finding the right balance between ISO, shutter speed, and aperture is crucial. While a low ISO improves image quality, it often requires slower shutter speeds, which can introduce motion blur if your camera isn’t stable. To counter this, using a tripod or other steady support is highly recommended, particularly when shooting high-contrast scenes.