Want to make your real estate photos stand out? Color correction in Adobe Lightroom can transform ordinary images into stunning, market-ready visuals. Here’s a quick guide to the essentials:
- Fix White Balance: Adjust temperature and tint to remove color casts.
- Set Exposure and Contrast: Balance highlights, shadows, and overall brightness.
- Refine Colors: Use the HSL panel to tweak hues, saturation, and luminance for natural tones.
- Remove Color Casts: Correct unwanted tints globally or in specific areas.
- Apply Technical Fixes: Enable lens corrections, remove chromatic aberration, and check for consistency.
These steps help real estate photographers address common challenges like mixed lighting, blown-out windows, and dull outdoor colors. Save time with custom Lightroom presets and ensure your edits look realistic by sticking to subtle adjustments.
Quick & Easy Color Adjustments for Real Estate Photos using …
Why Color Correction Matters in Real Estate Photos
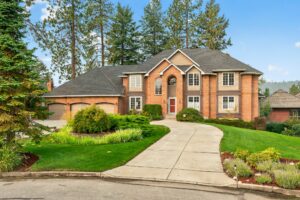
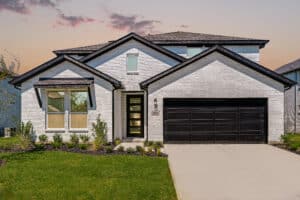
Getting the colors right in real estate photos can make or break a listing. Accurate colors not only enhance the property’s appeal but also help potential buyers get a clear picture of what they’re considering – both online and in print.
Impact on Property Marketing
Color correction isn’t just about making photos look good; it’s about turning them into powerful marketing tools. For example, HomeJab’s HDR service demonstrates how properly adjusted tones – balancing highlights and shadows – can make a property shine. The result? Photos that showcase a home’s true character and attract more interest from buyers.
Here’s where accurate colors make a difference:
- Natural lighting: Ensures window views and interiors are evenly balanced.
- Material accuracy: Displays surfaces like countertops and flooring as they actually appear.
- Room proportions: Maintains proper spatial balance through consistent color tones.
- Curb appeal: Captures architecture and landscaping in a natural, inviting way.
These adjustments solve common challenges and create photos that resonate with buyers.
Common Color Problems in Property Photos
Even with the best equipment, photographers often face color issues that need fixing:
| Color Challenge | Impact on Photos | Correction Needed |
|---|---|---|
| Mixed Lighting | Orange/blue casts from different light sources | Adjust white balance |
| Window Exposure | Blown-out windows with color bleeding | Use HDR blending and color recovery |
| Artificial Lighting | Green or magenta tints from fluorescent lights | Tweak color temperature |
| Weather Conditions | Dull or oversaturated exterior colors | Apply targeted color adjustments |
Indoor shots are especially tricky with mixed lighting. For instance, fluorescent lights often add an unwanted greenish hue to kitchen counters, or a mix of light sources can create uneven tones throughout a room.
Exterior photography isn’t any easier. Photographers deal with:
- Time-of-day changes: Light shifts that alter how colors appear.
- Weather conditions: Overcast skies dulling the vibrancy of outdoor shots.
- Seasonal differences: Landscaping that looks different depending on the time of year.
- Shadows: Balancing bright areas with shaded ones to maintain consistency.
Using tools like Lightroom, these challenges can be addressed to produce polished, appealing photos that don’t just look good – they help sell homes.

Color Correction Steps in Lightroom
Here’s a step-by-step guide to improving colors in real estate photos using Adobe Lightroom. Each adjustment builds on the last to create polished, natural-looking images.
Fix White Balance
Start by correcting the white balance to ensure neutral colors. In Lightroom’s Develop module:
- Use the White Balance Selector (eyedropper) tool to click on a neutral gray or white surface in the image.
- Adjust the Temperature and Tint sliders to eliminate any remaining color casts.
- Tip: For images with mixed lighting, use local adjustments to fine-tune specific areas.
Set Exposure and Contrast
Once the white balance is corrected, adjust the brightness and contrast:
- Use the Exposure slider to set the overall brightness.
- Adjust the Highlights and Shadows sliders to bring back details in bright windows and darker corners.
- Fine-tune with the Whites and Blacks sliders to balance the lightest and darkest parts of the image.
- Keep contrast balanced for a natural look that mirrors how the space appears in person.
Adjust Color Intensity
Refine individual colors using the HSL (Hue, Saturation, Luminance) panel:
| Color Element | Purpose | Suggested Adjustment Range |
|---|---|---|
| Hue | Corrects color accuracy | ±10 points |
| Saturation | Adjusts color strength | 5-15% increase |
| Luminance | Modifies color brightness | ±15 points |
Focus on key elements often featured in real estate photos:
- Green lawns and landscaping
- Blue skies
- Wood tones in floors and cabinets
- Stone and brick surfaces
Remove Color Casts
Unwanted tints can be a common issue in real estate photography. Address them with these steps:
1. Global Color Cast Removal
Use the HSL panel’s targeted adjustment tool. Click and drag over areas with color shifts to neutralize them while keeping the image’s overall color balance intact.
2. Local Color Corrections
Apply graduated or radial filters to fix specific problem areas, such as:
- Light bleeding from windows
- Mixed indoor lighting sources
- Reflections from colorful surfaces
Apply Technical Corrections
Wrap up by fixing any lingering technical issues:
- Turn on lens corrections to eliminate vignetting and distortion.
- Check for chromatic aberration, especially around windows or high-contrast edges.
- Use defringe adjustments if necessary.
- Double-check the final image on different screens to ensure consistent color accuracy.

Tips for Fast, Quality Editing
Speed up your workflow while delivering high-quality real estate photos in Lightroom.
Save Time with Custom Presets
Custom presets can cut down editing time and help you keep a consistent look. Create separate presets for:
- Interiors: Kitchens, bathrooms, and living spaces with different lighting setups.
- Exteriors: Adjustments for various daylight conditions and landscaping tones.
- Common Issues: Fixes for window glare, mixed lighting, or other tricky situations.
Start with basic tweaks like white balance and exposure. Then, fine-tune colors to keep the results looking natural.
Protect Your Photo Quality
Lightroom’s catalog is your ally for preserving original images. Use these non-destructive tools:
| Tool | What It Does |
|---|---|
| Virtual Copies | Experiment with alternate edits |
| History Panel | Review and revert changes |
| Snapshot Tool | Save specific editing stages |
Stick with RAW files in Lightroom’s catalog to ensure you can revisit and refine edits without losing quality.
Keep Colors Realistic
Accurate colors are key for effective property marketing. Here’s how to achieve them:
- Regularly calibrate your monitor and use neutral reference points in your photos.
- Avoid overdoing saturation – stay below a 15% increase.
- Use the HSL panel’s targeted adjustment tool for precise color tweaks.
Focus on subtle changes that highlight the property’s natural appeal. These steps will help you create polished, authentic images while saving valuable editing time.
Conclusion
Color correction in Lightroom can turn standard property photos into eye-catching marketing tools. By focusing on white balance, exposure, and color adjustments, you can transform images into professional-quality visuals.
HomeJab’s expertise highlights the power of precise editing. As Liz Zeng shares:
“The photos turned out absolutely fantastic – crisp, professional, and beautifully lit. The quality exceeded expectations, and the attention to detail was evident in every shot” [1].
Here are three tips to keep in mind for effective color correction:
- Start with the basics: Adjust white balance and exposure first before fine-tuning colors.
- Keep it natural: Ensure colors look realistic to maintain trust with potential buyers.
- Save time: Use presets and non-destructive editing tools to optimize your process.
These strategies not only improve individual edits but also show the value of working with professionals. HomeJab’s HDR photography, delivered within 24 hours, produces sharp, realistic images that can help attract buyers [1].