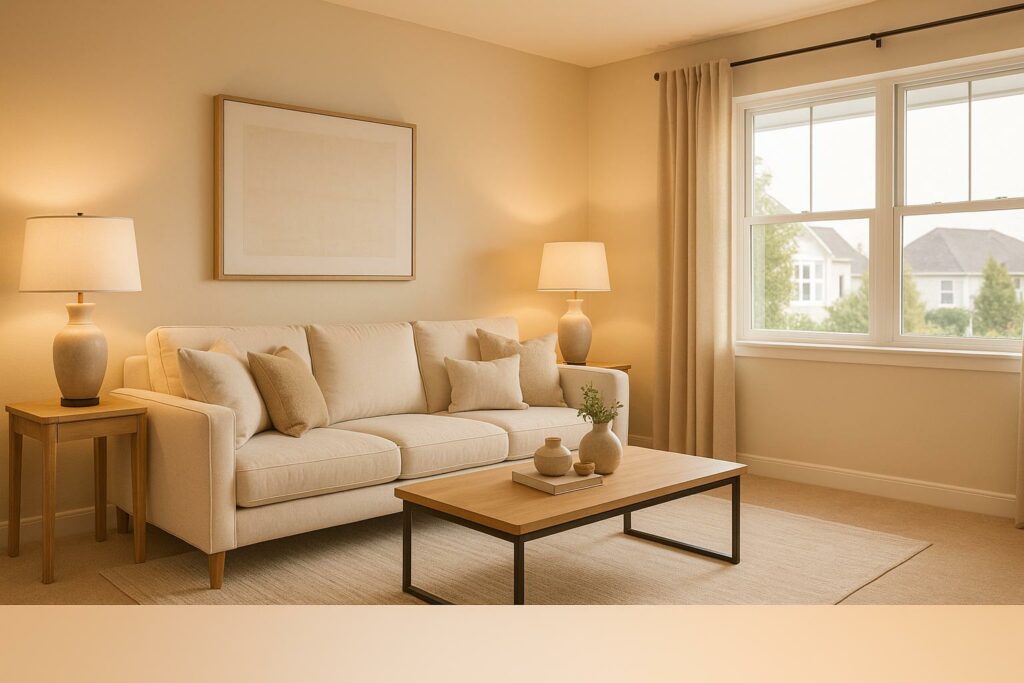
Want to make your real estate photos stand out? Mastering color temperature is the key to creating images that are accurate, inviting, and visually appealing. Color temperature (measured in Kelvin) influences the mood, feel, and accuracy of your photos. Here’s what you need to know:
- Warm Light (2000K–3500K): Cozy, inviting tones ideal for living rooms or golden hour exteriors.
- Neutral Light (3500K–5000K): Balanced, natural lighting perfect for kitchens and bathrooms.
- Cool Light (5000K–6500K+): Crisp, clean tones that enhance modern interiors and twilight shots.
Quick Tip: Use your camera’s white balance settings, shoot in RAW format, and adjust lighting to avoid color inconsistencies. Mixed lighting? Try turning off artificial lights or use gels to balance tones.
| Lighting Condition | Kelvin Range | Best Use |
|---|---|---|
| Candlelight | 2000K | Mood lighting |
| Incandescent | 2700–3000K | Warm indoor lighting |
| Natural Daylight | 5000–5500K | Neutral, accurate representation |
| Blue Hour | 7000–8000K | Twilight exteriors |
Perfect Interior Lighting Without the Color Cast! No Flash!
Common Color Temperature Ranges
Knowing the Kelvin temperature ranges is crucial for real estate photographers aiming to choose the right lighting for different spaces and scenarios. Each range creates unique visual effects that can either enhance or detract from a property’s overall presentation.
Warm Light (2000K–3500K)
Warm lighting produces a cozy, inviting glow that makes spaces feel comfortable and welcoming. This range includes candlelight at 2000K and traditional incandescent bulbs at 2700K–3000K, which emit light similar to sunrise or sunset. These tones resemble the soft warmth of classic Edison bulbs.
This type of lighting works well in spaces where ambiance is a priority. The amber hues encourage potential buyers to imagine relaxing in the space. For exterior shots, warm light during the golden hour casts a flattering glow over the property. It highlights wood finishes, brick exteriors, and other cozy details, making the home feel more inviting and lived-in.
Neutral Light (3500K–5000K)
Neutral lighting strikes a balance between warm and cool tones, offering natural-looking illumination without any noticeable color casts. This range is versatile and works particularly well in areas where accurate color representation is essential.
Kitchens and bathrooms are prime examples of spaces that benefit from neutral lighting. It accurately showcases countertops, cabinetry, and fixtures, highlighting materials like granite, marble, and tile. Natural daylight, which typically measures around 5000K, serves as a great reference for neutral lighting.
Professional real estate stager Hayden de Maisoneuve Yates emphasizes the importance of this range:
"When I am staging a house to sell, and I bring in furniture and colorful accessories to add more visual interest to the various spaces, I prefer to use 5000˚K daylight lighting to show off a house as well as my staging."
Daylight bulbs at 5000K mimic the neutral white light of a cloudless midday sun, offering excellent color accuracy for showcasing interior design elements.
Cool Light (5000K–6500K+)
Cool lighting delivers a crisp, daylight-like tone that conveys a sense of cleanliness, modernity, and spaciousness. This range spans from 5000K up to 8000K, which is ideal for blue hour twilight photography.
Modern and minimalist interiors thrive under cool lighting, as it enhances colors and creates a fresh, clean appearance. Higher Kelvin values are particularly effective for exterior photography in overcast conditions (6000K–6500K) or during twilight (7000K–8000K).
Cool light minimizes harsh shadows and provides bright, even illumination, making spaces feel larger and more open. It’s perfect for contemporary homes featuring sleek finishes, stainless steel appliances, and modern architectural details. By understanding these ranges, photographers can make informed decisions about lighting and white balance to complement a property’s unique character.
| Lighting Condition | Kelvin Temperature | Best Application |
|---|---|---|
| Candlelight | 2000K | Mood lighting |
| Incandescent | 2700–3000K | Traditional indoor lighting |
| LED Lighting | 3000–4000K | Modern interiors |
| Natural Daylight | 5000–5500K | Exterior shots |
| Overcast Sky | 6000–6500K | Shaded or covered areas |
| Blue Hour | 7000–8000K | Twilight exteriors |
The key to great real estate photography lies in aligning the color temperature with the mood and purpose of each space. Keeping the lighting consistent throughout a property tour creates a cohesive visual experience that accurately reflects the home’s character. Mastering these temperature ranges helps photographers fine-tune white balance and seamlessly integrate lighting tools during shoots.
How to Manage Color Temperature During a Shoot
Understanding color temperature is one thing, but managing it effectively during a shoot is where the magic happens. By fine-tuning your camera settings and making smart lighting choices, you can capture property images that look natural and consistent across different rooms.
Using Camera Settings to Adjust White Balance
Your camera’s white balance settings are your best friend when it comes to controlling color temperature. While Auto White Balance (AWB) might work fine for basic lighting setups, it often struggles with mixed lighting conditions. To get better results, try switching to manual white balance. Most cameras offer presets like Daylight, Cloudy, Shade, Tungsten, or Fluorescent. For even more accuracy, consider using a gray card to set a custom white balance. Adjust these settings as you move from room to room to avoid unwanted color shifts.
Another tip? Shoot in RAW format. RAW files give you more flexibility to tweak white balance during post-processing, making it easier to achieve consistent colors across your images.
| White Balance Preset | Kelvin Value (Approximate) | Lighting Condition |
|---|---|---|
| Daylight | 5000–6500K | Sunny day |
| Cloudy | 6500K | Overcast day |
| Shade | 7000–8000K | Shaded areas |
| Tungsten | 2500–3000K | Incandescent lighting |
| Fluorescent | 4000–5000K | Fluorescent lighting |
Once you’ve nailed your white balance settings, you’re ready to tackle the challenges of mixed lighting.
Balancing Mixed Lighting Sources
Mixed lighting is a common hurdle in real estate photography. Natural light from windows often has a cooler tone (5000K–6500K), while interior lights tend to be warmer (around 2700K–3000K). To keep your images looking consistent, start by identifying the dominant light source.
If daylight is the main light, try turning off the artificial lights and set your white balance to Daylight. This helps eliminate clashing color tones. On the other hand, if you need to use artificial lighting, consider applying CTO (Color Temperature Orange) gels to your flash units. These gels can warm up the flash to match the warmer tones of interior lights.
For situations where natural and artificial light are equally prominent, HDR (High Dynamic Range) blending can be a lifesaver. This technique combines multiple exposures to balance both the brightness and color tones, resulting in a more harmonious image.
Using Lighting Equipment for Consistent Color
While manual white balance adjustments and careful handling of mixed lighting go a long way, professional lighting gear can take your results to the next level. With tools like bi-color LED lights, you can precisely control the color temperature to match the environment. For instance, bi-color LEDs allow you to adjust between warm (3200K) and cool (5600K) tones, giving you full control over the lighting setup. The Lume Cube Bi-Color LED Lights are a great example – they’re portable, versatile, and perfect for both studio and on-location shoots.
When using flash, watch out for color casts caused by bouncing light off colored walls or ceilings. A gray card can help neutralize these unwanted tints. Also, keep your flash settings consistent across similar spaces, especially if you’re creating virtual tours. This consistency ensures smooth transitions between rooms, giving viewers a seamless experience.
sbb-itb-82c5f45
Post-Processing Color Temperature Adjustments
Once you’ve set your on-location color temperature, post-processing becomes your secret weapon for refining and balancing each shot to perfection.
Editing RAW Files for Better Color Control
Working with RAW files is crucial for achieving precise color temperature adjustments. Unlike JPEGs, which lock in the white balance during capture, RAW files retain all the original color data, offering far more flexibility in editing. As PixelShouters puts it, "Shooting in RAW format provides more data to work with during color correction, offering greater flexibility and control".
RAW files give you access to 12–14 bit color depth, compared to the 8-bit limitation of JPEGs. This means you can make substantial adjustments to white balance without degrading the image quality. This extra data becomes especially valuable when dealing with tricky lighting conditions, a common challenge in real estate photography.
| Feature | JPEG Limitation | RAW Advantage |
|---|---|---|
| Color Depth | 8-bit color | 12–14 bit color |
| White Balance | Limited | Full adjustment range |
| Color Data | Compressed | Complete data preserved |
| Recovery | Minimal | Extensive highlight/shadow recovery |
To make the most of your RAW files, start by using the white balance tool in your editing software. Select a neutral area in the image, like a white wall or ceiling, to let the software automatically adjust the white balance. Then, fine-tune the temperature (to adjust warmth or coolness) and tint (to correct magenta or green casts) sliders until the image looks balanced and natural.
Fixing Mixed Lighting in Post-Processing
Dealing with mixed lighting is a frequent hurdle in real estate photography, but tools like Lightroom make it manageable. When your image includes both natural daylight and artificial indoor lighting, start by balancing the exposure before tackling color corrections.
Adjust the highlights and whites downward while lifting the shadows and darks to create an even exposure across the frame [18,27]. This step lays the groundwork for more precise color adjustments. Next, use the HSL panel to tweak the hue, saturation, and luminance of any problematic colors.
For areas with stark lighting differences, local adjustments are your best friend. Mask specific sections, such as a warm-lit corner or a cooler window area, and adjust them individually to harmonize the overall color temperature.
Keeping HDR Photography Consistent
HDR photography presents its own challenges when it comes to maintaining consistent color temperature. The trick is to ensure a uniform white balance across all exposures before blending them into a final composite. This prevents unwanted color shifts caused by slight variations between frames.
When bracketing exposures for HDR, apply the same white balance settings to every shot. If you’re working in a particularly complex lighting setup, creating custom white balance settings for each major light source can help fine-tune the accuracy.
Using manual white balance modes is especially important when shooting HDR brackets, panoramas, or any series of images intended for blending. Consistent settings streamline the editing process and result in more natural-looking images.
Perfecting color temperature in post-processing isn’t just about aesthetics – it directly impacts the effectiveness of your real estate photos. Listings with high-quality images receive 118% more online views compared to those with lower-quality visuals. By mastering these editing techniques, you’ll elevate your real estate photography, making properties more appealing and marketable.
Professional Real Estate Photography Services
After diving into the nuances of color temperature in both shooting and post-processing, professional photography services take these practices to the next level. They ensure a polished, consistent look for every property, combining technical expertise with a keen eye for detail. By mastering both in-camera techniques and post-production adjustments, professionals deliver seamless color accuracy and visual harmony across entire portfolios.
Achieving perfect color temperature isn’t just about theory – it’s about flawless execution. Professional services guarantee this consistency from the very first shoot.
Why Professional Real Estate Photography Matters
Professional photography overcomes technical hurdles that can make or break a listing’s appeal. Accurate color correction is key to building buyer confidence, as it ensures the photos reflect the property’s true colors. When every room in a listing shares the same natural, balanced color tone, it creates a cohesive visual narrative that helps buyers imagine themselves living there.
The results speak for themselves: properties with high-quality images sell up to 32% faster and for 47% higher prices. This isn’t just about aesthetics – it’s a proven strategy for faster, more profitable sales.
Professional photographers rely on tools like gray cards to perfect white balance and maintain uniform camera settings throughout a shoot. This level of precision eliminates inconsistencies, ensuring every photo aligns with the overall visual standard.
Buyers notice these details too. In fact, 83% of homebuyers say photos are a critical factor in deciding which homes to visit in person. Accurate images not only help buyers make better decisions but also reduce the risk of disappointment during in-person tours. When your photos genuinely reflect the property, you build trust that extends well beyond a single transaction.
Investing in professional photography also shows sellers and buyers that you’re committed to presenting properties in their best light. This attention to detail elevates your marketing materials, strengthens your reputation, and ensures a smoother, faster sales process.
HomeJab: Reliable and Efficient Photography Solutions
HomeJab takes real estate photography to the next level with advanced techniques and precise post-processing. Their approach tackles the challenges of managing color temperature across diverse properties, delivering natural, vibrant images even in tricky lighting situations. Starting at $229, their HDR packages expand dynamic range, making them ideal for spaces with large windows, skylights, or mixed lighting setups.
HomeJab’s photographers combine technical skill with efficiency. Using professional-grade tools and HDR methods, they produce consistent, high-quality results, while their streamlined workflow ensures every photo meets the same standard. This systematic approach keeps color adjustments uniform across entire property portfolios.
HomeJab’s success is backed by client feedback. Liz Zeng shared: "The photos turned out absolutely fantastic – crisp, professional, and beautifully lit. The quality exceeded expectations, and the attention to detail was evident in every shot. The company was incredibly responsive and easy to work with, making scheduling and rescheduling a breeze. I highly recommend their services and would gladly book with them again!".
Their virtual staging services also shine, boasting a 4.8 out of 5 rating from 865 reviews. Even with digital enhancements, they maintain impeccable color accuracy. And with a 24-hour turnaround time, you don’t have to compromise on speed to get top-tier results – a key advantage in today’s competitive real estate market.
The numbers back up the investment: homes with over 20 professional photos often sell within a month, while listings with fewer or lower-quality images can sit on the market for an average of 70 days. Considering carrying costs, marketing expenses, and lost opportunities, professional photography often pays for itself by accelerating sales.
| Service Benefit | Impact on Listings |
|---|---|
| Accurate Colors | Builds buyer trust and reduces in-person letdowns |
| Expert HDR Techniques | Handles challenging lighting with ease |
| Consistent Portfolio | Enhances agent branding and professionalism |
| Quick Turnaround | Speeds up listing launches |
HomeJab’s nationwide network ensures the same high-quality results, whether you’re listing a chic downtown condo or a spacious suburban home. This consistency is invaluable for agents working across multiple markets, where lighting conditions may vary but client expectations remain high.
Conclusion: Mastering Color Temperature for Real Estate Success
Getting a handle on color temperature can completely change the game for your real estate photography. By mastering the Kelvin scale, you’ll have the power to control the mood and atmosphere of your shots, creating visuals that not only showcase properties accurately but also spark an emotional connection with potential buyers.
When your photos reflect true-to-life colors, they build trust with buyers and minimize any letdowns during in-person viewings. Buyers who see accurate, inviting images are more likely to feel connected to a space even before stepping through the door. This authenticity doesn’t just smooth out the sales process – it also solidifies your reputation as a meticulous and reliable professional.
Shooting in RAW and using custom white balance ensures your entire listing maintains a cohesive and polished look. This approach tells a consistent visual story that keeps buyers engaged and demonstrates your dedication to delivering high-quality results. In competitive markets, this attention to detail can make your listings stand out.
Consistent, color-accurate photos don’t just look good – they deliver real results. Properties with well-managed color temperature tend to attract more online views, lead to more showings, and often sell faster and at better prices. Pairing these skills with services like HomeJab’s HDR packages can amplify your success even further.
At its core, color temperature isn’t just a technical detail – it’s a creative tool. It allows you to emphasize architectural highlights, showcase interior design, and create a warm, inviting atmosphere that turns casual browsers into serious buyers. Master these techniques, and you’ll consistently produce images that leave a lasting impression in today’s image-driven real estate world.
FAQs
How can I maintain consistent color temperature in real estate photos when dealing with mixed lighting?
To keep the color temperature consistent in real estate photos when dealing with mixed lighting, start by setting your camera’s white balance to align with the main light source. For instance, go with 5500K for daylight, 3200K for tungsten, or 4000K for fluorescent lighting. This adjustment helps keep the colors looking natural and uniform throughout your shots.
Using a gray card or a color checker can be a game-changer for fine-tuning white balance before you start shooting. These tools help reduce unwanted color casts caused by mixed lighting. Once you’ve captured your photos, you can use post-processing software to make any final tweaks, ensuring your images look polished and professional. Following these steps will result in property images that are both consistent and visually appealing.
Why is shooting in RAW format important for adjusting color temperature in real estate photography?
Shooting in RAW format is a game-changer for real estate photography because it gives you unmatched control over color temperature during editing. Unlike JPEGs, which compress image data, RAW files retain a much wider range of color and light information. This means you can adjust white balance and fine-tune color temperature without sacrificing image quality.
This flexibility is crucial in real estate photography, where mixed lighting is often a challenge. For instance, the combination of natural sunlight streaming through windows and the warm glow of indoor lighting can result in uneven color tones. RAW files let you correct these inconsistencies with precision, ensuring the property’s colors appear natural and inviting. The result? Stunning, true-to-life images that grab the attention of potential buyers and showcase the property in its best light.
Why is understanding color temperature important in real estate photography, and how does it influence buyers’ impressions?
Understanding color temperature is key in real estate photography because it helps ensure that property images appear natural, inviting, and true to life. Measured in Kelvin (K), color temperature determines whether the lighting in a photo looks warm or cool. For real estate photos, a range of 5000K to 5500K typically works best, as it highlights spaces accurately while creating a welcoming atmosphere.
Choosing the right color temperature can make a big difference in how buyers perceive a property. It can evoke positive feelings and help potential buyers picture themselves living in the space. On the flip side, incorrect lighting can make rooms appear unappealing or distort their actual colors, which might turn buyers away. Professional photographers, like those working with HomeJab, know how to adjust color temperature to enhance property listings and draw in more interest.

